
Maine Coon Cat Carving (now completed)
-

The whiskers have been added and the whole carving (with the eyes masked) was sprayed with an acrylic matte finish for protection.

The white has been toned down a lot with more brown and more beige tones .

I recarved some of the mouth area and retextured it; repainted to tone down some of the white and the pink on the nose. When I add the whiskers, there will be a little bit more painting to do and that will tone down the white a bit more.

A little more painting is done here. Except for detail, I’m using several thin washes to build up the color.

Just a thin coat of burnt sienna acrylic paint as a base coat.

The lower jaw was recarved for a more petite look

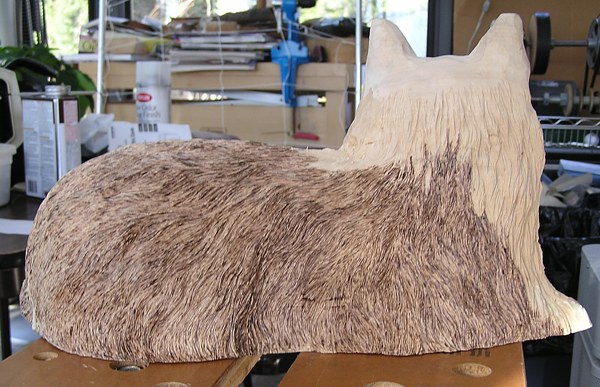
It has taken a good amount of time, but finally the texturing is completed. I used 3 different size V-tools and the skew tip on the wood burner followed by a good rubbing with Scotch-Brite synthetic steel wool and a brush to remove any particles left behind. Next step will be painting.


The eyes have not really been set in here…they are just loosely placed in the sockets. I thought it looked a lot less eerie than it did without any.


This may look like a step backwards, but actually it isn’t. Part of sculpting is being able to periodically take a step back and take a good critical look. If there is something that isn’t quite “right”, it gets changed.
In this case, there was what I thought to be too sharp a line, or delineation, between the side and hip, or leg. I recarved that am now happy that it is much softer.


I’ve finally been able to get back to work on this after some distractions, including trashing my wood burner!Here you can see more texturing has been done, and the eyes have been hollowed out to accept the glass eyes, which are on the table in front of the cat.
Life has been so hectic lately, I had to take a little time from this carving to finish a Santa for a gallery Holiday Show opening this week. With Maine Coon Cat on my mind, I thought I would have this Santa holding one

10-inch Santa with Maine Coon Cat

I’ve been working on shaping the front of the cat, the folds where the body bends and the hair flows over the bends. Still a way to go, but getting there.

Home now from the week-long Gathering of Woodcarvers, and back to work. This is starting to look like a cat now. I will be adding glass eyes later.


Looking a little more like a cat!

Still not looking quite like a cat, but getting there! 🙂

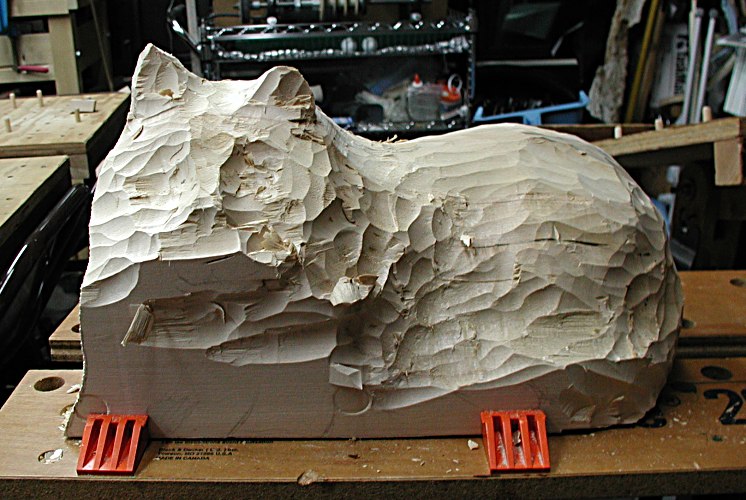
Here you can see the head starting to take shape.

Getting started on the basic shape of the carving.

The pattern was traced onto the glued up block and bandsawed to make the blank that I’ll begin to carve.

Because of the large size of this carving, three 3-inch thick pieces of basswood were planed smooth and glued together. Glued and clamped, the blank will be strong and less apt to crack than if I used one thick piece of wood. One large piece would probably include both heartwood (closest to the center of the tree), and sapwood ( closest to the bark) which dry at different rates. That difference can cause stress cracks, or “checks”.

Sometimes transforming a 2-dimensional image into a 3-dimensional sculpture can present some uncertainty in the design. Here I use clay to make a 3-dimensional model. This helps me to “figure out” the basic shape of the carving. No details are needed here. Once I have the basics worked out, I can then make sketches of the subject from different angles. These will become my pattern.


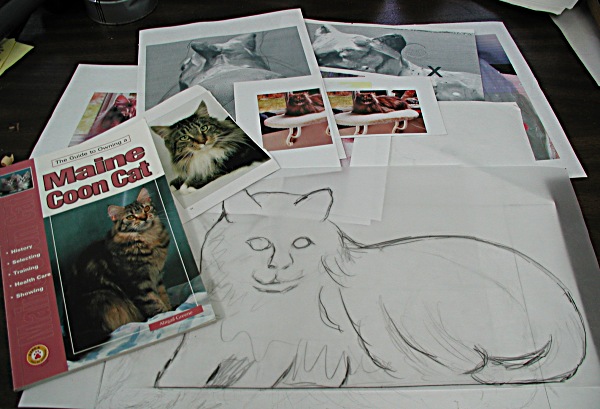
Some of the reference material and drawings.
The first step in designing a new carving is to collect as much reference material as possible.

Leave a comment